Monday, May 30, 2011
Product Photography for Artists
Also, please check out the “Photography Basics” tag for more tutorials.
View PDF file here:
http://www.klsphotography.com/files/11227/productphotography.pdf
-Kelly
Wednesday, April 20, 2011
Choosing Film
Buying film can be intimidating if you’re not familiar with the process. C-41, black and white, C-41 black and white, infrared, 35mm or 120…
Whatever your film needs, the first step is to buy from Freestyle Photo. They are trying to support analog photography and will continue to make film products until they go broke! Support Freestyle who supports keeping film alive!
Whether you buy 120 or 35 will depend on your camera - that should be pretty straight forward. Picking a film processing type will be a different thing.
Black and white professional films (I heart Kodak Tri-X, which isn’t shown here because I shot all of it) need to either be processed by hand using black and white developing chemicals or taken to/sent to a lab that has the chemicals. In Siskiyou County, you have a couple places in Medford, Crown Camera in Redding or you can send away to Photoworks in SF, who doesn’t charge very much to process film.
Black and white film also varies in price, just like black and white darkroom paper. It has to do with the amount of silver in it. Images are created using silver halide, and since silver is spendy, more silver = better film = more money.
On a totally unrelated note, this is why I love Ilford Warmtone paper even though it’s more than a dollar a sheet.
Next, we have C41 process film. This is basic color film processing. They happen to make black and white film that can be processed in C41 chemicals, but most of the prints will have a tint and you can’t hand print from them in a black and white darkroom. C41 processing is simple. Drop it off at Rite Aid, Crown Camera or (if you have time) send it away to Photoworks. Rite Aid sometimes abuses my film, so a professional lab is preferable.
Infrared film works just like black and white film, only you pre-soak it in water. Oh, and it records a totally different spectrum of light, has to be loaded and unloaded in total darkness and requires an R72 filter to get those neat IR effects.
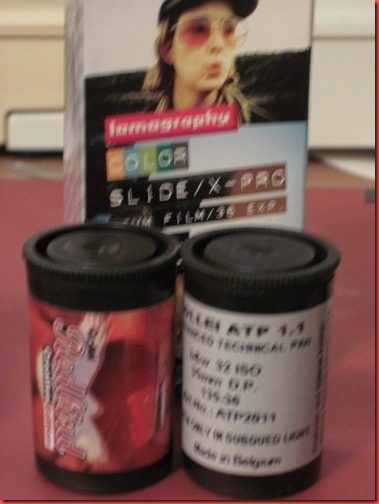
Weird film is weird. So weird, I couldn’t get a clear shot of it. Rollei, Holga and Lomography make some great stuff. Just follow the directions.
Finally, if you’re not cross processing, slide film is processed in E6 chemicals and gives you a positive slide (instead of a negative). This is one to send to Photoworks as well.
That’s about it. Finding a film you love has a lot to do with personal taste. I like Tri-X because I like grain, but it’s not for everyone. The reason I have all these film types is because I intend to shoot all of them and compare and understand them all. Look for more on that in… a long time… there’s a lot of film there!
Thursday, February 24, 2011
Using Color Print Filters for Digital Editing
In my years of shooting film, I’ve stumbled across some great gadgets built for film photography that can be used in digital photography. My color correction filter pack is one of them.
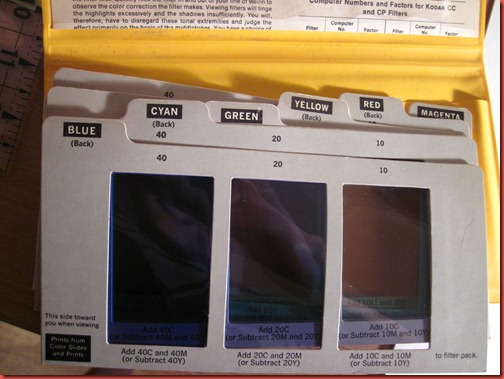
They come in a whole pack with both CMY and RGB filters, each with their own gradient. The purpose of these was originally to help with color correction in a darkroom (color darkroom printing post coming soon, so you’ll see what I mean).
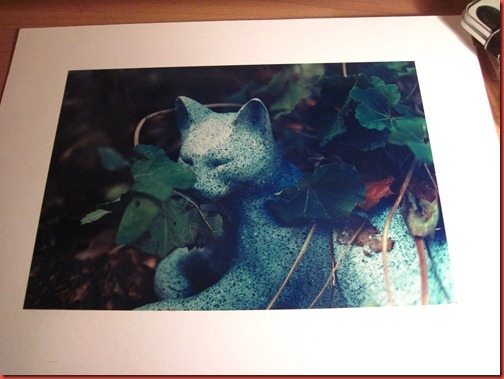
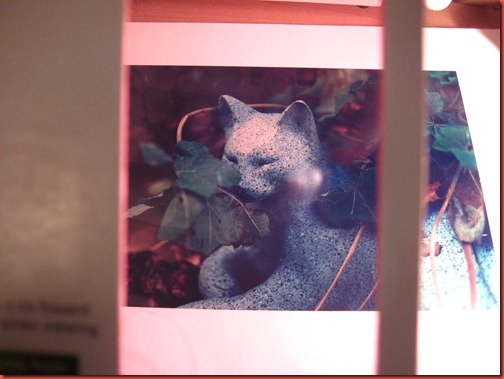
Example, here’s a color print I hand processed in my color darkroom. I love it, and if you follow my color film photography you know I often add a color cast to photos. In this case, I added a hint of blue.
These are simple enough to use. Pick the color that is opposite to the color you think you’ve made a mistake with (so for blue cast, I’d grab yellow). Look through the various viewing windows until the colors look right to you, then read the box below to see how to correct this in a darkroom enlarger.
Here’s when we view the photo through a yellow filter. The blue cast is corrected.
Here’s when we look through a magenta filter. It’s pretty easy to tell that we don’t need any additional magenta in this photo.
So, that’s pretty much it for film. Just keep looking through squares until it looks right, make the suggested adjustments and run your next print through.
Now, how can we apply this to digital? Here’s a SOOC shot I took at a wedding. It has a cyan/blue cast that I don’t like. Let’s use the filters and see what could work better.
I held the yellow filter card up to the screen and we can see that the middle filter is the closest to correcting the color. The left is too yellow, and the right is too blue.
So, how is this more useful that just using Photoshop tools? Sometimes it’s not. The white balance auto-correct in camera raw works well a lot of the time, and you can eye your colors using a lot of the color correction tools built in. Why this is handy is because camera raw doesn’t always get a perfect white balance. Also, this gives you a starting guide with color correction without having to wait for actions to process or having to use the history button.
The only drawback I’ve found is that color correction units (which the cards use) don’t currently translate to Photoshop CS4. While doing a quick Google search, I found there are plug-ins you can get which will translate color correction units to Photoshop. In the meantime, I think this at least provides us with a shortcut and an idea of where we’re going.
Happy editing!
Kelly
Friday, February 18, 2011
Want to master your exposure?
Here's a touch of reality for people who are just learning photography. I apologize if I sound strict, but give it some consideration and don't be discouraged. I've written a great beginner photography guide and I'm available to answer questions via email or in the comments section of any post.
The digital age has many advantages, but also a lot of technology that makes for lazy photographers. I hear so, so often how someone would prefer to do something because it’s easier or faster. How can you expect to master any art by doing what is easiest and fastest? You can’t.
One reason I’m handy with a TTL light meter and can nail exposure and focus most of the time is because I started shooting film on old manual cameras. I don’t like digging out photos in Photoshop, I’d rather be outside with a camera than inside with the computer!
Imagine this for a minute, put your camera in Manual mode, turn off the auto focus and the LCD screen. Oh, and also, put in a really small memory card and shoot in raw so you only have about 30 shots. All of a sudden, you’re really thinking for every shot. You’re looking at the light meter, you’re double checking your focus, you’re being careful with composition.
In film, you’re limited to the number of exposures on a strip of film. Want to shoot 35mm? You have 24-36 shots. Switch to medium format, and you’re stuck with 12-15 shots. Get any larger than that and you could have only 1 or 2 frames to shoot. Oh, and did I mention that a roll of film costs upwards of $4-5 for those 12 shots. Or that sheet film is up to $1 a shot? I bet you’re not firing off anything without some thought at $1 a shot.
Now, stop imagining and actual try some of this. Grab a film camera. Change all those settings on your DSLR and forget the delete button exists.
Pushing yourself to get the right shot on the first try will make you a more efficient, intuitive and eventually, successful photographer.
To purchase film, I recommend Freestyle Photo. Film is a dying art, and Freestyle is dedicated to keeping it in production - often creating product lines to replace discontinued lines from Kodak or Polaroid. Please support them!
Kelly
Saturday, January 15, 2011
Sunny 16 rule
As a follow-up to my series on the Basics of Manual settings, here’s a quick and awesome tool for reading light without a meter. On a sunny day, in direct sunlight, at f16: Your shutter speed will be the reciprocal of your film speed.
ISO 100 = f16 at 1/100th. ISO 400 = f16 at /400th.
You can easily extrapolate on the Sunny 16 rule. If you’re using a pinhole or a Holga with a fixed aperture, just work from Sunny 16 out. Here’s other apertures that use the film speed/ISO rule of Sunny 16.
f/22
Snow/Sand
f/16
Sunny
f/11
Slight Overcast
f/8
Overcast
f/5.6
Heavy Overcast
f/4
Open Shade/Sunset
Pretty useful for analog photography. Next… a Lomography post!
Shasta Betty
Tuesday, January 11, 2011
Basics of Manual Camera Settings–Part 4–Stops and Metering
So, now that you know what all the things do, it’s good to know how they relate to what you see and how that helps you take good photos.
In camera metering is fairly easy. I’ve seen a couple different types of meters. Here are some drawings that illustrate both what they look like and how bad I am at drawing.
Some meters have a scale where the middle line indicates what the camera thinks will be a properly exposed scene (cameras base exposure on a percentage of gray, so they usually won’t expose all black or all white scenes well, I’ll explain how to compensate in a minute). An alternative to the scale is example 3, where there will be a needle that bobs around. Finally, some meters will tell you what f-stop you should be exposing for based on the film speed setting you are using. These can have both meters, or numbers that light up.
The idea is to change settings until the needle is in the middle/the lit number corresponds with what you have set.
There are a couple ways to do this. Example 1 and 3 show over exposure (your settings will make the photo too bright). Either close your aperture (bigger f-stop number), increase your shutter speed or lower your ISO – in this case, 1 stop in example 3 and 1/3 stop in example 1.
So, what are stops exactly? Stops are full measurements of ISO, aperture or shutter speed. They are an equal distance from each other as far as exposure is concerned. In ISO and shutter speed, each stop is twice as much as the one before it. 1/4 second to 1/2. 100 ISO to 200. In aperture, it’s pretty much the same thing, except there’s a lot of math involved. Square roots of 2 or something. I don’t think it’s something we need to know, so here’s the short version. Full aperture stops are: 1, 1.4, 2, 2.8, 4, 5.6, 8, 11, 16, 22 and 32. There are others, but these are most common.
How do stops relate to each other? If you move your shutter speed one full stop faster, you can move your aperture one stop wider and have the same exposure. How is this useful? If you have a light meter or your camera meter says to expose at f4 for 1/1000th of a second, you can increase depth of field by exposing at f5.6 for 1/500th or f8 for 1/250th.
To make this easy, here’s a craft tutorial for a stop slider!
Step 1, draw lines to separate out 15 equal spaces. Now do it the other way so you have rows of squares the length of the paper. I know these pictures don’t follow what I’m saying, but trust me and do it this way instead.
Leave the far left spaces blank (I didn’t and had to re-do it.) Start writing in your f-stops (see above) starting with f32 and ending with f1 (which is backwards from this picture. This craft was an epic fail last night, I redid so so much…). In the second row, write your shutter speeds starting with 4 seconds, up to 1/1000th. (4”, 2”, 1”, 1/2 OR 2, 1/4 OR 4, 8, 15, 30, 60, 125, 250, 500, 1000). Now skip a row. Write your ISOs, left to right, 25, 50, 100, 200, 400, 800, 1600, 3200.
Cut the top 2 strips out. Leave 1 blank space on each side of each row, then cut the excess off.
Cut out 2 windows below the ISO row.
Fold the back around, then staple (or glue or whatever) the back shut and along the edges of each window to create little holes.
Insert your 2 strips from before. Now you’ll have a handy slider. Using ISO as your starting point, slide the 2 rows to match with settings from camera or a light meter. Now you can move any 2 rows to the left or right and have the same exposure.
In this photo. 1/15th, f4 at 400 equals 1/30th f2.8 at 400. 1/4, f8 at 100 equals 1/8, f8 at 200. And so on…
So, now that we know what metering and stops are, we can look at ways to use them.
Remember when I mentioned your light meter works with a certain percentage of gray? That means if it sees something black, it will try to make it look gray and over exposed. This is where you can shift a couple stops to over or underexpose a photo so that it works for your subject.
Another genius thing to do is bracket. Take one shot normal, one shot 1 or 2 stops over and another 1 or 2 stops under. Some cameras even have auto bracketing (with 3 clicks of the shutter, it will automatically shoot one normal, one under and one over).
I hope all that has helped your use of manual camera settings. You should be well on your way to getting out of auto mode and into manual mode. At least try using Tv or Av if you don’t feel like metering. That way you can set the shutter speed or aperture and the camera will do the rest.
Finally, always ALWAYS set your ISO in digital!!! Use the lowest ISO your photo will allow!
Happy shooting,
Shasta Betty
Monday, January 10, 2011
The Basics of Manual Settings–Part 3–Aperture
Now that we know ISO and Shutter Speed, it’s ready to move on to Aperture. Aperture can be confusing, but let me let you in on a secret, it’s only the jargon that is confusing. When you come right down to it, aperture is the size of the hole in your lens that is letting light through during a photo.
You know how your pupils get bigger or smaller depending on the ambient light? The aperture basically does the same thing. Only, instead of having your own super smart brain to do it automatically, you have to tell it what to do. We do this by setting F-stops.
What’s an F-stop. Well, it’s a mathematical calculation of the focal length divided by the diameter of the aperture opening, but you don’t need to know that right now. All you need to know, is the smaller the f-stop number, the bigger the hole and visa versa. F1.4 is a very big hole. F22 is a small hole. If you get into pinholes, sometimes those are F300, but that’s a whole other story.
So, what is the point of aperture? Well, obviously a bigger aperture (f1.4) will let in more light. This means you can shoot at a higher shutter speed and/or lower ISO than at f22. Example: if you are shooting at 200 ISO at f4 and your shutter speed is at 1/30th, but you need it at 1/60th, change to f2.8.
Now for the fun part of aperture, it controls your depth of field. Depth of field refers to the amount of stuff in a scene in front of or behind your focal point that will be in focus. When you shoot at a wide aperture, your depth of field will be really short.
In this photo, my dog’s eyes are in focus, her ears are sorta in focus, but the focus drops off at her nose and in the background.
This can be a nice feature because you can use depth of field to focus on a subject and blur out the background.
Or, on the other hand, you can shoot at a smaller aperture, such as f22 and get more depth of field. Or take it one step further and use a pinhole and achieve almost infinite depth of field.
This is my mailbox and street at f22.
Some other things of note about depth of field, the closer your subject, the shorter your depth of field.
Some of the older cameras even had depth of field guides on the focusing ring.
In this photo, the top 2 lines of numbers are focal distances, the 3rd line down shows where the focus is (orange line). It also shows, with the mirrored f-stop numbers, what distances would be in focus at that particular setting.
If the above settings were used at f22, everything from 1.5 to 10 meters would be in focus. At f 11, everything from 2 to 4.5 meters would be in focus and so on.
This can be handy for having complete control over depth of field. Do you want more in focus in front of your subject than behind it? Using the guide numbers, you might not actually focus on your subject to control where the depth of field lies.
Finally, depth of field is controlled by how much your focal subject fills the frame. If you zoom in (or get close), you will have a shorter depth of field than if you shoot at a wider angle.
Those are the basics of aperture! Now we can see how the 3 settings come together… tomorrow we’ll talk about stops… and there will be a handy craft project!!
Shasta Betty
Sunday, January 9, 2011
The Basics of Manual Settings–Part 2–Shutter Speed
So, yesterday we learned ISO. Now, lets talk about shutter speed.
Your shutter speed dictates how long your camera takes to take a photo. Depending on your camera, you can take photos that are only 1/1000th of a second long, or photos that are hours long.
The way shutter speeds are typically notated is either as a fraction (1/30), as just the denominator for shutter speeds under 1/2 a second (30), as the number of seconds (2'” or 2.5” or 2-5”… just look for the second symbol – a quotation mark “) or as B aka Bulb. Bulb is when the shutter will stay open as long as you hold down the button. More on that later.
There are a bunch of reasons you could want control over your shutter speed.
Let’s tackle shutter speed in hand held photography. When you hand hold a photo, being human and all, you can only take a photo for so long before you start to introduce shake into the photo from your movement. The general rule is, whatever your focal length is, that as the denominator should be your slowest hand held shutter speed. For example, if you are shooting a 50mm lens, you shouldn’t shoot hand held any slower that 1/50th. With a 300mm zoom lens, you shouldn’t shoot hand held any slower than 1/300th of a second. Now, some of us are steadier. If you take a breath, let it halfway out, hold it and squeeze the shutter it helps. When shooting digital, if you really have no other option, just try to steady yourself and take a bunch of shots and hope one is sharp.
The second reason to control shutter speed is to capture motion. A fast shutter speed will freeze a moving object in a photo.
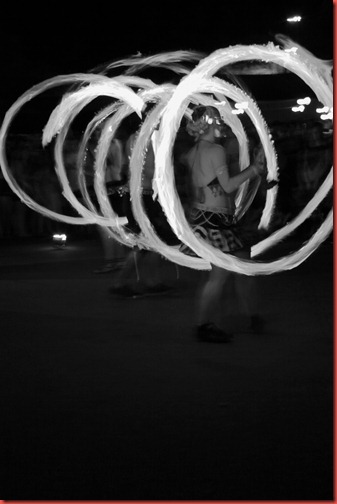
A slower shutter speed will show movement in the photo (this is a good time to use a tripod so your background is steady). This is especially fun with any type of moving lights.
So, now you know the main reasons to use certain shutter speeds, hopefully you understand a little more about the usefulness of ISO settings from yesterday’s post.
For example. If you are set at ISO 400 and can’t get your shutter speed faster than 1/30th, and want it at 1/60th, you would move your ISO to 800.
Tomorrow – Aperture
And to completely kill any mystery and let you know what to anticipate, here’s how it’s going to go:
Aperture
Stops – Hopefully with a Crafty tutorial that will help with your metering!
In Camera Metering
Then I’ll be going into a series on Night Photography!!
It’s getting really exciting around here, people! Okay, well, I’m excited at least.
Shasta Betty
Saturday, January 8, 2011
The Basics of Manual Settings–Part 1–ISO
I was going to call the post “In Camera Metering for Dummies”, based on a suggestion. However, you are not dummies!!! You are all eager to learn and trying to figure out something new and I think that makes you a SMARTIE! Also, I was originally only going to write about in camera metering. Instead, I am writing a whole series on the basics of manual settings.
Welcome to Part 1!
Parts 2, 3 and 4 will all be in sucession, so click on the "newer posts" link after each tutorial and you'll be directed to the next installment.
One of the hardest things for people new to photography to do is switch out of Auto Mode. Auto mode is nice, it’s comfortable, but it won’t always give you the best photo or the photo you want. Auto usually shoots around f8, with reasonably fast shutter speeds (1/100th) at ISO 400. They’re going for decent depth of field, a well exposed handheld shot and a mid range ISO.
We can do better!
Here’s a rundown of the basics for anyone who is brand new to all of this (or even people who aren’t brand new and may have forgotten or never learned).
Exposure (how bright or dark the subject of our picture is) depends on 3 things. ISO, aperture and shutter speed.
ISO (also know as ASA) refers to how fast your film is. In the digital world, it refers to how fast your sensor records light. ISO 100 is a slow film speed, ISO 1600 is a fast film speed. However, there’s a trade off. Faster film speeds produce grainier pictures (with digital, this is also called noise).
Here’s an example. 2 shots of the same scene on the same night at different ISO settings. Ignore composition and exposure – we’re just looking at noise.
Shot at ISO 200
Shot at ISO 3200
Although, sometimes grain can have a pleasing effect. Especially in black and white. This all depends on taste, but my favorite portrait film to shoot is Kodak Tri-X 400 because it’s grainy.
So how do you choose an ISO setting for a particular shot. Well, it depends on a couple things. First, if you’re shooting film, you put in a film whose speed will serve well for whatever you plan on shooting. You’re stuck with the same speed for the whole roll. For this reason, I personally stick with 400 speed film. It’s a good middle number for all around shots. If you’re going to be shooting outside in the sun, go with 100. Shooting indoors with no flash, pick 800 maybe.
With digital, we can change the ISO for every shot. My rule of thumb is to use the lowest ISO you possibly can for the aperture and shutter speed you need. For example, if it’s sunny and you’re shooting a landscape at f 16, 1/100th of a second (we’ll get to what those mean later) with ISO 100, you’re doing good. If you’re at f 1.4 and 1/8th of a second handheld on ISO 100, you need to turn the ISO up to get a faster shutter speed.
Don’t worry if you’re still confused, since ISO is only 1 of 3 things to consider for your exposure. Once we talk about aperture and shutter speed, I promise you’ll catch on. Until Part 2!
Shasta Betty
Thursday, November 18, 2010
Camera Presets
As much as I love Photoshop, I also try to produce photos that look great straight out of the camera. It’s nice to be able to upload photos right away and skip the whole post processing rigmarole.
One of my favorite in camera enhancers is using the picture style presets. While I stick to Standard presets during most things, if I know I want colors to pop, or really sharp pictures, or photos with a lot of contrast, I can change this all in the picture style presets. To find these, I recommend looking in your manual. I’d love to throw in a menu tutorial, but my 50D varies so much from a Rebel and even more so from a Nikon, so I’ll leave this up to you.
First, some photos with the Sharpness and Saturation bumped all the way up. Fun. Bright. Yummy colors.
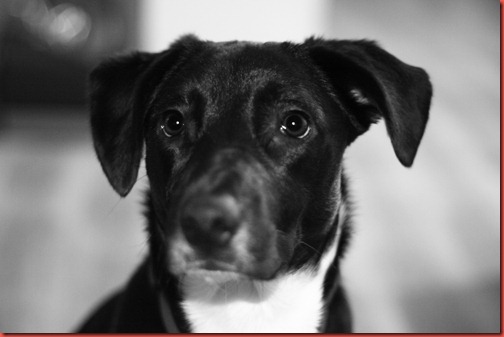
Then, these have the sharpness and contrast boosted, but in black and white. I love sharpness when shooting animals. It really brings out the fur.
Zero time spent in Photoshop…
SB
Tuesday, November 16, 2010
Custom White Balance
I know it sounds intimidating, but custom white balance is something that will drastically improve your photos, especially if you are shooting a set where the lighting is steady during your whole shoot (or even just a good chunk of it).
I’ll break this down step by step using my Canon DSLR, my Mr’s Nikon DSLR and my Canon point and shoot. Hopefully that will serve as a good jumping off point for most cameras, but feel free to email me if you need help. I’ve been known to delve into in depth photography lessons when people need help. Leave a comment, email me at klsphoto@hotmail.com or contact me through my website.
First, here’s an example of why you should use Custom WB (both shots are straight out of the camera):
On auto mode at the Brewery in Weed, which has horrific lighting. I mean, it’s really really bad.
After spending 30 seconds setting my WB using a napkin of all things.

That’s a huge difference. Sometimes Auto mode just doesn’t cut it.
How to set it:
Step 1 for most DSLRs is to take a close up picture of something white with minimal texture to it. A plain piece of printer paper works. Make sure the picture comes out completely “white,” however it will have a tint from the lighting where you are. Hints: turn off autofocus (if your camera allows it) and try exposing for a stop or two over what the camera recommends (try manual mode, or go to the exposure compensation in your menu.)
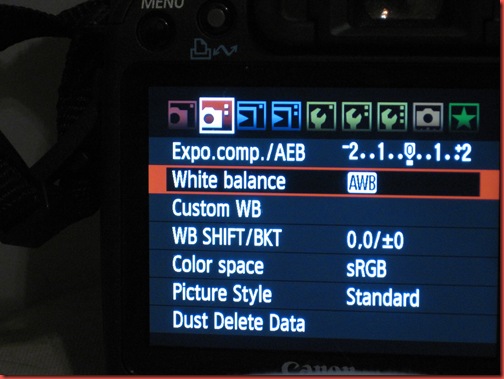
Step 2 (Canon DSLR) – Press menu. Go to WB and set it to Custom. You can do this after to, but eventually you have to set it to this or you’ll be creating a custom WB for nothing.
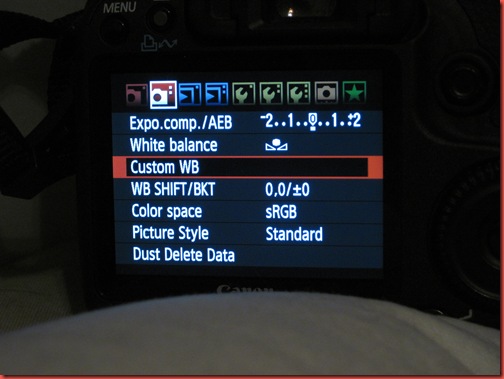
Now go down to the Custom WB item.
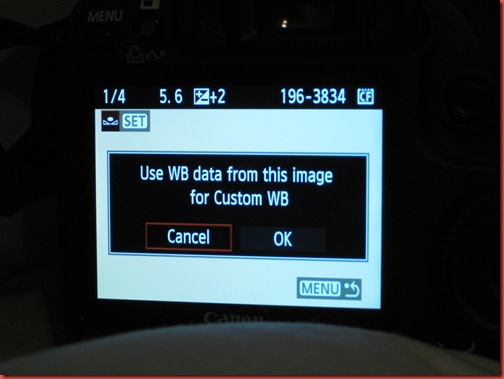
This will bring up all the images on your CF card.
Scroll through until you find the white sample image you just shot.
Hit the select button.
And confirm. Now your white balance is set. If you want a little more technical information, I’ll go into it at the end, but for now I’ll spare the people who aren’t strange and inquisitive like me.
Step 2 (Nikon DSLR) This setting is a little more compact, it’s all in one menu.
With Mr’s Nikon, I press the right button to go into a menu. So go right and scroll down to “preset."
Go right again and choose “Use Photo”
Hit the right button a couple more times to choose which folder the image you’re using is in, then you’ll bring up a menu of pictures.
Find your sample shot and hit Enter.
All done!
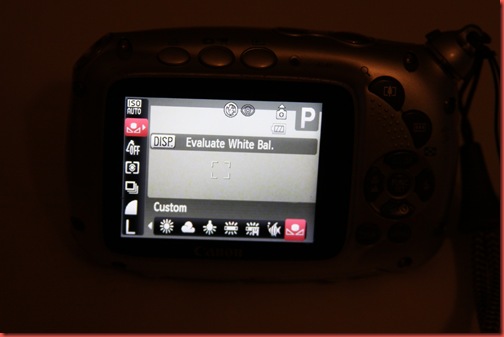
Finally, Canon point and shoot. I happen to have a 10D Waterproof camera. No sample shot required, just go into a normal screen in Program mode and hit the middle button to bring up settings. Note: Custom WB doesn’t work in all shooting modes. Some modes, such as underwater, have preset the white balance for you.
Scroll down to the white balance icon, then go left until you bring up the custom symbol. My camera asks that you point at something white and press Disp to set the custom WB. It’s pretty similar to using the color select feature.
Simple enough, you should be taking white photos now.
Warning: Technical Stuff!!
Okay, it’s not actually that technical. Setting your custom white balance is all a matter of telling the camera “This is White” – a decision it makes on its own in Auto WB mode. Much like in Photoshop’s camera raw, it reads what should be a white object and then adds or subtracts tints until white things are truly white.
There are other more complicated ways of setting white balance based on light temperature and Kelvins, which is what sets the white balance when you use other settings such as Tungsten, Florescent or Cloudy. This is more of a studio photography thing, and not something I want to learn at this point in my career. I’m pretty happy with custom and auto white balances.
Well, hope you learned something. Feel free to ask if you want to know more.
Thank you and Love you for sticking through that whole post.
Betty West aka KLS Photography


