Friday, July 30, 2010

Large Format Pinholes

Can’t afford a Large Format Camera?  Me either.  Even if I had the $4000+ to get one of these (or the hundreds you would spend used), there are other things, such as lenses, I would spend it on first.

However, there is something kinda fantastic about a negative that is 4 inches wide and 5 inches tall.  IMG_2412Contact prints the size of snapshots, and you can enlarge the photos to… I don’t even know.  So if you really want one, but don’t want to pay for it, I suggest building (or buying) a 4x5 pinhole camera.  

If you have some basic carpentry skills, you can build one of these fairly easily.  It’s essentially a double thick box, constructed to be light tight, with a pinhole lens in the front. 

The film backs (whichIMG_2414 you can pick up on Ebay for a couple bucks each) are held tight to the back with mini bungee cords. The handle on top makes this thing easier to move around, plus it looks nice.  On the bottom, there is a tripod mount that is as simple as inserting the right sized nut or threading to fit a tripod.
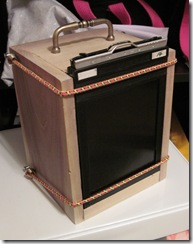
IMG_3595


Now, if you don’t have great carpentry skills (which I don’t), you can go my route and buy a box pinhole.  They vary in price range, and you may find yourself making some adjustments once it arrives, but it saves some time and makes it possible for people who don’t know what a circular saw is.  I found mine on Ebay, but try Etsy, Santa Barbara camera or just use Google.

I loved this camera, but when it showed up I noticed that the film holders had some room to slide around in the back, and I didn’t trust how light tight the system actually was, so I got out some plain black mounting board and made some additions.IMG_3592

This is a pretty good view of the inside, which I only modified in 2 places.  The black inner box of this camera is recessed from the wood, which is where the film holder sits.  I added a small strip to the bottom of the wood to make the IMG_3596film holder sit highhigher, and a strip at the top that matches the recessed part of the top of a film holder.  Film holders have a couple indentations and such that help hold them in place and serve as bevels to block out light.

IMG_3598To secure the film holder from the back, I added a flap.  I cut and glued strips of mount board so that the flap fits in the indentations of the film holder and around the edges, creating (hopefully) a better seal to keep extra light out.  It’s not the pretties thing ever, but I like having the extra security. 

All together, it looks like this:


IMG_3603

Next, just load film and shoot.  There is no shutter and no lens cap.  To expose a sheet of film you have to remove the dark slide from the film holder.  I use my finger as a shutter, blocking the hole while I remove the dark slide, then put it back after the exposure to block the pinhole while I put the dark slide back.

Some helpful advice:

The dark slide tops are usually silver or white on one side and black on another.  This is so you can keep track of which holders are exposed or unexposed.  Most people use black for exposed film, but it’s really up to you.  Just make sure you remember which is which!  I know a lot of people who forget halfway through and then all your film is either double exposed, or not exposed at all.

It’s hard to know which was is up in the darkroom.  4x5 sheet film needs to be loaded in complete darkness, so you can’t see which side the emulsion is on.  If you always load film so that the notches are on the upper right, then you’ll be ok.

Finally, the size of your pinhole, the focal length and the light in a photo will all determine your exposure length. 

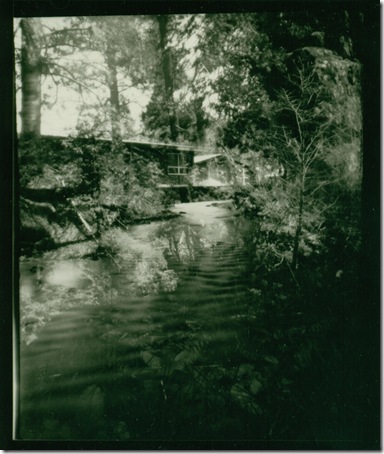
Here’s my one successful example (I forgot which color meant exposed).  It’s a double exposure of a creek at COS and the grass in my front yard.

001 (2)

Hope someone has fun with this project.  Let me know if you try it!

Update for some hardcore DIY-ers:  This article gives a pretty good run down of how to construct one of these from scratch.  It uses foam board instead of wood, but it’s a great jumping off point.  There are also some helpful links for calculating optimum focal length if you look in the comments.

Monday, July 19, 2010

ISO – the third button of digital

Back in the days of film, for each shot on an SLR your exposure depended on setting the aperture and the shutter speed.  Yeah, ISO made a difference, but you were stuck with one setting for an entire roll of film.

IMG_0314Fast forward to the days of digital, and you can change your ISO for every shot.  Personally, this was something I had to get used to.  I always shot on ISO 400 until someone said “so you’re getting noisy shots during the day when you don’t have to and having to use a tripod in low light when  you don’t have to?”  Oh.  I see your point.

So now, if light permits I can reduce noise (or add it) by picking my ISO.  I can also use ISO to change my shutter speeds without having to give up depth of field or change my aperture.

IMG_0217 Example:  I shot Pyrate Technics at Carnivale in Weed this weekend.  I never changed my aperture, but I had a wide variety of shutter speeds.  When I wanted to capture the full motion of the fire, I switched to 100 or 200 and shot on bulb.  When I wanted a crisp photo of the dancers, I cranked my ISO to 1600 and shot at 1/60th or faster.

It’s something pretty simple, but it can really change how your pictures turn out.

First shot, ISO 1600, 1/60 at 3.5.  Second shot: ISO 100, 1 sec at f5.

Tuesday, July 13, 2010

Post process - Vignetting

IMG_9620 I like vignetting in my photography.  Vignetting is where the edges of your photos are darker than the center.  It’s something I’ve been especially drawn to after viewing Nick Brandt’s work.

In the darkroom, vignetting is creating by burning down corners before developing or using a circle to dodge the center.

However, far easier and more accessible, is vignetting in digital photography.  If you have a pretty good grasp on Photoshop, you can create this effect with just a couple layer adjustments. 

Most people create this effect by burning in the corners, but I learned a technique from photographer John Rickard that I love and I think most will prefer after trying it.

Original photo, no post processing:

Vignetting using the “burn” feature in Photoshop:

This photo illustrates the 3 reasons I don’t like to vignette with the burn feature.

The vignette isn’t circular.  It’s possible to get a perfect circle this way, but much harder.

The darker areas are gray as opposed to dark (you’ll see more clearly in further examples) unless you take the time to burn highlights, midtones and shadows.

The edges aren’t well blended.

Now, vignetting using layers, levels and eraser:

Much better.  The darkness in the top corners is much more progressive and the effect is less obvious.  Although, if obvious is what you’re going for, it can also be done as seen in the first photo of this post with a little tweaking, though still keeping a natural looking fade.

I also like that the vignetting is circular.  Plus, this method is faster than burning.


One more in black and white with some other editing.  I think vignetting is always more intense in grayscale.

How to (click any image to see it larger):

duplicate layer In Photoshop, open your layers tab and duplicate the background layer. 

If you’ve created other adjustments, pay attention to the order of your layers or flatten the image. 

curves layer In the duplicate layer, create a levels adjustment layer then clip it to the duplicate layer.  Adjust the photo so that it’s dark.  Right now the whole photo will be dark, but just pay attention to the clipping maskedges and see if they’re where you want them.

This is where you can decide how strong the effect will be.  The shape of the vignette will depend on erasing in the next step.

Finally, take your eraser tool and adjust it to a HUGE circle almost the size of your photo. 

eraser Select your duplicate layer and erase the middle until it looks right.  It’s quick, so be gentle.

For more obvious edges use a smaller radius on the eraser and loop it around the area you want brighter.  You can also dial up the hardness of the eraser tool. 

Final Product:

IMG_9845 fix 

And one last example (and the image I learned this technique with after showing), in case you’re not convinced:

Burning                             vs                     Layer/Eraser Method

IMG_1988 IMG_1988

The first example shows the grayness of burning and how it’s less than ideal in some photos.

Sorry if that was long, but it’s worth learning.  There’s a lot of advantages to having different ways to create effects in post processing. Another hint for vignetting using a 3rd technique, look into selections and refine selection.  You can soften the edges of your selection in this menu.  I might show some examples next post…

Happy editing!

Monday, July 12, 2010

And the Winner is…

Thanks to everyone who entered my blog contest.  Before I announce the winner, I want to give everyone who entered the contest 50% off any portrait package as a thank you for participating.  I would have picked you all if I could!

And the Winner is…

Karen Martinez!

Just contact me via facebook and we’ll discuss when/where/how you’d like to use your free photo shoot.

And since this is my first blog post in over a month, here’s a couple Prints of the Week.  I took these over the past month and all of them were taken at night.  I’m having a lot of fun with night photography, so expect more.

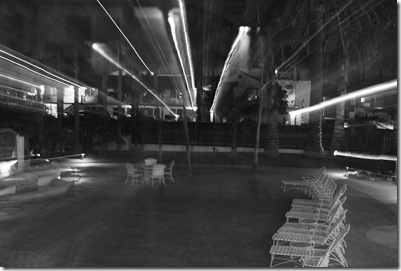
From the hotel in Santa Barbara.  Long exposure, so I decided to see what happens when you zoom during an exposure.  Well, this happens:

IMG_9830

Night shot on the wharf.  That’s the moon, although it does look sunny.

IMG_3234

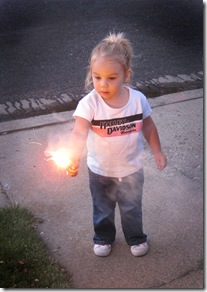
Weird one, but I like it.  My friend’s son trying to light the sidewalk on fire with sparklers on the 4th.

IMG_3384

Well, thanks again to everyone for reading and posting comments.  I really appreciate the feedback.