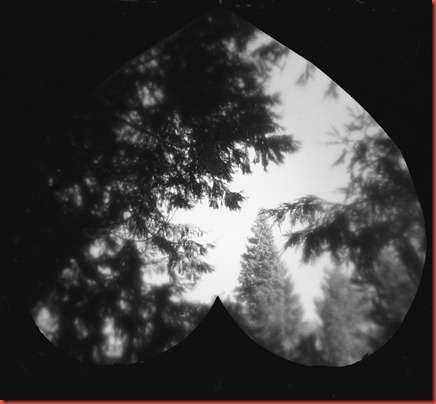
Sunday, January 30, 2011

Panoramic Printing

I love big photographic prints.  LOVE them.  I also happen to love really small photographic prints.  So, either 4x5 and under or 11x14 and over.

I’ve also learned from a photographer friend and mentor of mine, that every photo has ONE size.  So, you see that great photo of yours that you want to offer 8x10 or 11x14 prints of?  Pick one.  You can’t have both!  Well, technically you can, but you shouldn’t.  I printed a beautiful 8x8 print from my Diana mini… looked at it, held it way back and said “Yep, this need to be a 6x6… or even a 4x4”.  That’s just life.  I’ve also printed shots done on 35mm from my Holga on 8x10 paper, and liked them.  Then after said photographer friend and mentor looked at them, he said “Make them huge.”  Once they were 11x14, there was no going back.  Sorry for the tangent, long story short: Each photo has ONE size it should be printed in.  Try a couple versions and figure it out.

Currently, I want to print this:

edit panarama web

Click on the photo, it’ll open in a new window so you can see the whole thing.

I took this panorama North of Weed and stitched it all together, ran some other photo enhancing things in Photoshop (it’s not cheating if you can do all the same stuff in a darkroom), and gave it a size.  This happens to be a 12x60” photo.  That’s right, a foot tall and five feet wide.  That’s it’s size.

Now, I have to figure out where to print it!  I want a canvas wrap, because I wouldn’t even know where to get a 12x60 frame.  I’m going to attempt to go local if I can, but I’m still doing the starving artist thing – so if someone can suggest some great and not too expensive print labs for canvas, I would appreciate it.

Shasta Betty

Wednesday, January 26, 2011

Want a Fisheye Lens?

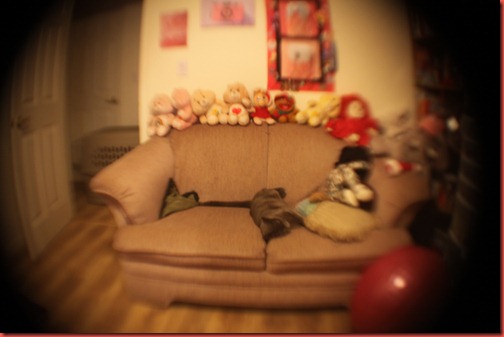
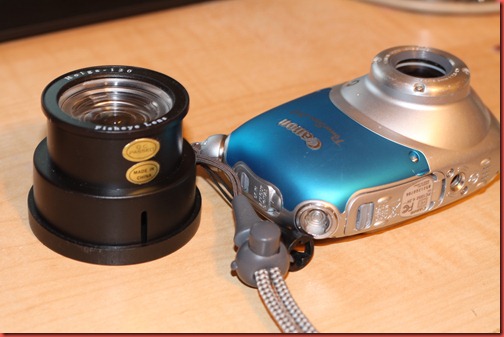
But don’t want to pay a lot for it?  Try a fisheye adaptor.  I have one for my Holga, and I wanted to see what else it could do.

Hmmm…

What if I hold it up to my DSLR lens?

IMG_7787

That’s kind neat… but I think the lens is too big and the attachment is too small.  The fall off of the focus is rather nifty, and it all looks nice and low tech.  Maybe I’d rather make an adapter using one of those door peep holes…  Or make this a permanent adapter… I’m just not falling in love yet.

What else?

IMG_7784

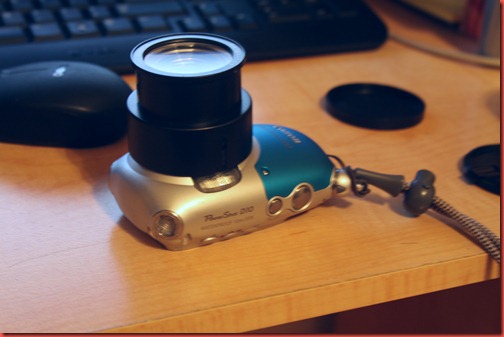
We might be on to something here.  The fisheye lens fits right up close with the lens of the camera without the attachment sleeve getting in the way.

IMG_7792

There we go!

IMG_6422

Now lets see if I can hold this thing without putting my fingers in the frame.

IMG_6421

Maybe we should use a piece or two of electrical tape instead.

IMG_6426

This is fun.  Let’s see if we can buy more of these.

IMG_6427

Between Freestyle, Urban Outfitters, Photojojo and the Lomography Store, I’ll never be bored again.

Shasta Betty

Friday, January 21, 2011

Stereo Pinhole

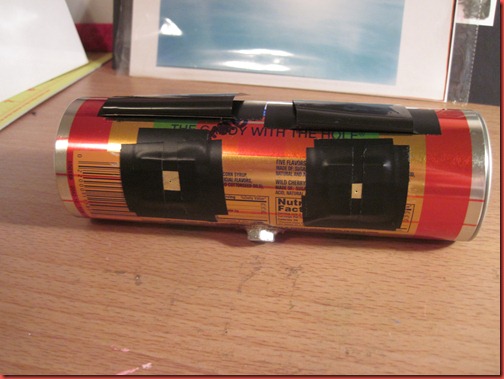
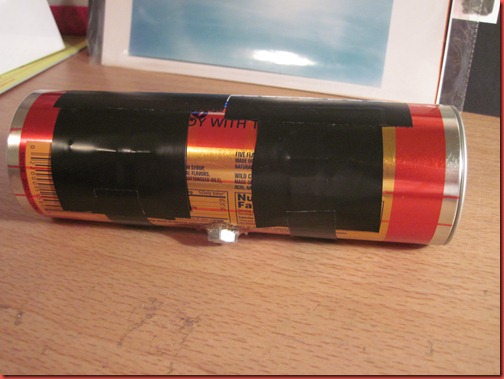
Though not technically stereo, because it’s not lined up to shoot 3D, I did make a pinhole camera that has 2 holes… meaning 2 overlapping images.

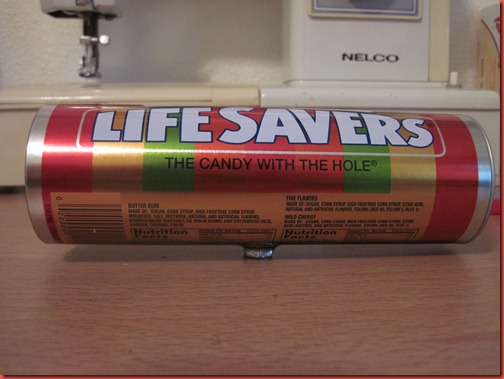
You can start with almost anything that is light tight.  Paint can, wood box, old soda can, matchbox… or this lovely Life Savers tin we got for Christmas.

IMG_6315

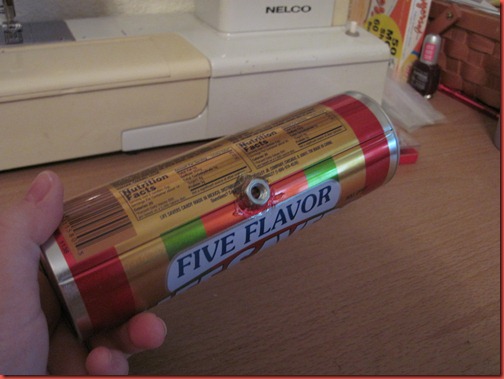
I started by using E6000 to glue a tripod nut onto the bottom.  If you haul your tripod into any hardware store and go to the loose nut aisle, they’ll help you find the right size.

IMG_6316

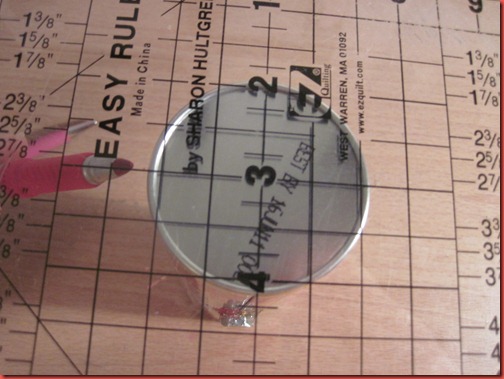
I used a clear ruler to line up where I wanted the holes to be.

IMG_6317

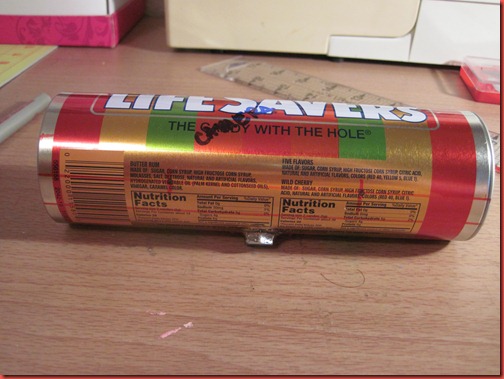
Then I drew it out and placed blue marks where each drill hole would go.

IMG_6318

I made 2 matching pinholes, using this method, and taped them in.

IMG_6360

Then made 2 shutters using the lining material from darkroom photo paper. 

IMG_6361

Okay, this is the cutest camera ever.  Just sayin’.

I went outside with it and set it on the spare tire on the back of my Wrangler and took a shot using darkroom paper.  With this specific camera, it was about 20 seconds shooting into the setting sun.

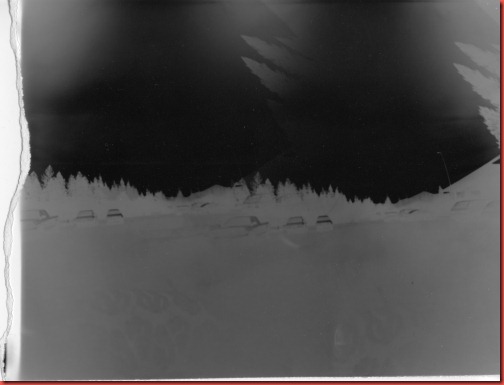
Here’s my negative, straight out of the darkroom print lab.

img078

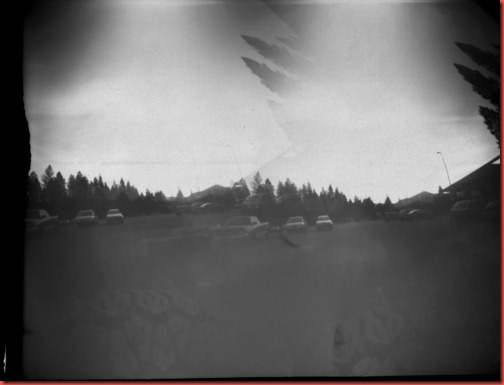
And the corresponding positive after inverting it digitally.

img078pos

The distortion with this camera is insane.  I have the paper curved all the way around the back so you can see in this shot some of the neatest things about pinholes.

1 – they are really wide angle.  In this shot you see both the tread from my tire and the trees above my car.

2 – infinite depth of field.  The tread is in focus.  The trees way off are in focus.

3 – If your camera has a curved back – such as with a paintcan – you get interesting distortion toward the edges.

Finally, With this particular camera, there is a double image.  You see the cars, tread, trees all appear twice, overlapping in the middle.

Are you doing this yet?  You should be doing this.  Pinhole is the camera at it’s most basic!  For more pinhole resources, please visit www.jamesgilmore.net – both his galleries of pinholes and his blog which links to more pinhole resources.

Shasta Betty

Thursday, January 20, 2011

Night Photography–Using Flash

There are a couple different fun ways to use flash or lighting in night photography.  First, there is light painting.  Then, there there is slow sync flash.  Finally, there is the creativity of multiple flash.
Slow sync flash, which is easiest to shoot in Aperture Priority mode, leaves the shutter open long enough to expose for a dimly lit background while using the flash to illuminate your subject in the foreground.  Depending on how light or dim the background is, use a tripod.

Here’s an example of what NOT to do.  I should have used a tripod and didn’t. 
IMG_0980
f1.8, 1/2 second.  If I had used a tripod, my lovely friend Amber would be sharp and without blur in this shot.  Live and learn.  And, occasionally, if you’re really lucky – you’ll meet someone who will do the living just so you can learn.  Aren’t I nice?
Another way to use a flash is to fire it multiple times in one exposure.  I did that back here to get the double exposure of the sewing machine.  Another option is to put the camera on Bulb on a tripod and fire your flash manually multiple times.
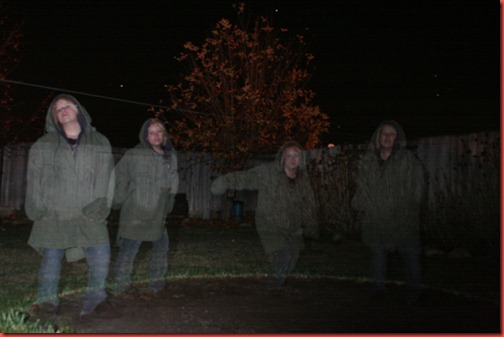
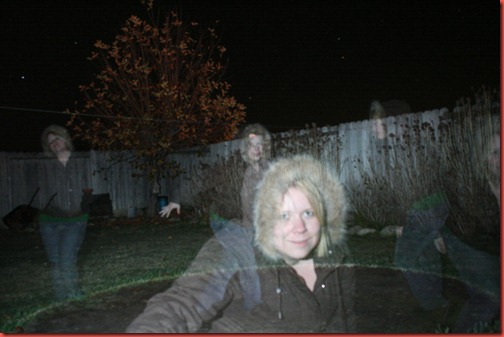
What you get is a ghost of your subject.  Here’s my sister being a creeper while I played with this a couple years ago.
IMG_5438
21 seconds at f9.  The entire scene is lit by multiple flashes.  Moving her makes her all ghost-y.
IMG_5447
29 seconds at f10.  We learned that the closer she was to the flash, the less transparent she was.  What you set your f-stop to will depend on how many times you want to flash in a particular shot.  Around f10 I could get in about 5 flashes and have the right exposure.
There’s no great formula for this.  Everything will depend on your flash output, the space you’re using, f-stop, aperture, how many ghost people you want per shot… the key here is to experiment.  A lot.  This is a project I recommend testing on digital.  Or bracketing on film.  Like, major bracketing.  I mean, shoot a whole roll playing around.
So, I hope that I gave you some good information, but this really just scratches the surface on the creative things you can do and how different flash settings will affect things – such as motion.  I'd really like to revisit this as soon as I have some good test shots.  No promises on when, just know it will happen!
Next, a couple alternative photographic tutorials.  Get ready to explore your inner Holga and Pinhole lover.  It will be fun!
Shasta Betty

Monday, January 17, 2011

Night Photography–Part 2–Star Trails

Star trails are my absolute, without a doubt, favorite part of night photography.  They look pretty stationary when you stare up at them, but they actually move in a huge swirl across the sky over time.  Take a peek:

The guide I have says 2 hours in no moonlight at f5.6, ISO 100.

Here’s my two cents, which you can ignore or not.  Stars are constantly moving.  It’s not like you’re going to overexpose them, because even within 30 seconds they’re in another part of the sky.  Throw your aperture wide open so your star trails are as bright as possible and either A) expose for whatever your foreground subject is or B) Expose all night… or until you get too cold to stand out there.

Here’s why – the longer exposure the more star trails.  If you want to have longer star trails, but your foreground is blown out, then you can turn your aperture down.  Or your ISO.  You’ll have slightly dimmer, longer star trails.  But they’ll still be pretty.

Some examples (I want to point out that it was partly cloudy that night, but because the clouds moved quickly, the photo ends up with an interesting haze).

IMG_2427

ISO 400, f4, 5 minutes

IMG_2429

ISO 200, f4, 10 minutes

The exposures are exactly the same, but the star trails are longer.

IMG_0803 edit

ISO 400, f4, 11 minutes.  Another hazy sky, which reflects brown instead of blue.

IMG_6269

ISO 200, f16, 36 minutes.  I do this with Mt. Shasta a lot… sorry.

So, there’s another way to do star trails that I just started using and kind of like.  You need a camera with 30 second exposures and continuous shooting mode.  You very definitely need a tripod.  You also need a free exe file called Star Trails.  It’s available for download on the creator’s website

You take a series of 30 second exposures continuously, using a remote, for as long as you want.  Then the program stitches the results together.

The main reason I love this is because you get the same results are a 2 hour exposure, but if you accidentally shoot for 4 hours and your photo is too light, you just take out enough photos until the exposure looks good.  It’s stacking each photo as a layer (which would take you 400 hours in photoshop), then giving you the output.

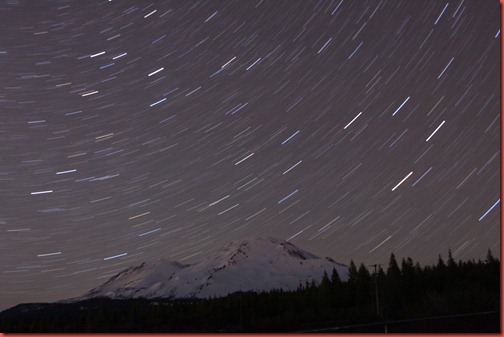
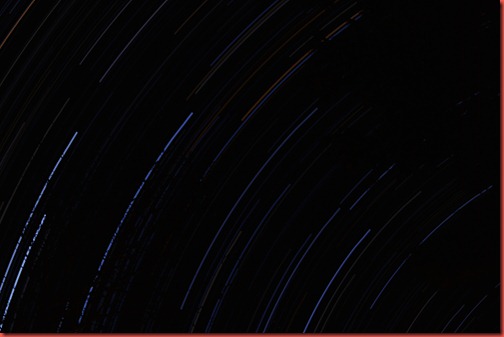
Here’s one I shot the other night of star trails through the trees in our back yard.

Startrails 2

I let it go for about 2 hours before my camera battery died.  Oops.  There’s another tip – fresh batteries and empty memory cards.  Especially if you’re doing the star trails program.  30sec exposures for 2 hours equals 240 pictures!

About 3 minutes of letting the program run, and I have this shot.  Lovely.

Tomorrow: How to use a flash in your night photography to capture people!

Shasta Betty

Sunday, January 16, 2011

Night Photography–Part 1

I love night photography.  Not so much during winter months, because it’s awfully cold out there, but still.  There are some weird pretty things you can do at night that you just can’t do during the day.

For example, photograph star trails. 
Startrails 2

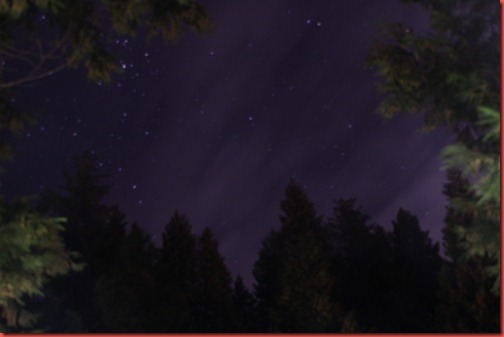
Or see how blue the sky can be at night.
IMG_7509

Or… okay, there are a lot of ORs, let’s learn how to do this.

You’re going to need some equipment.  First, a tripod is highly recommended.  Not that I haven’t set my camera on my car or the sidewalk or a railing at one point in my life because I had to, but it’s limiting.

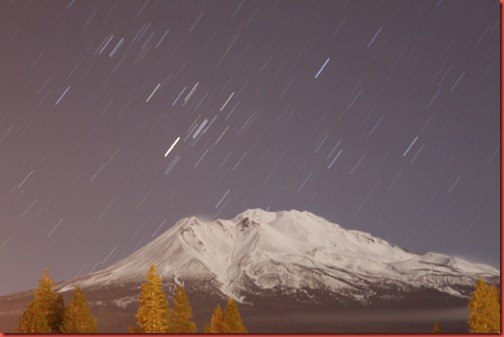
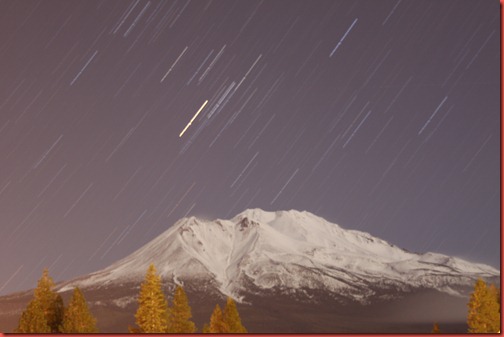
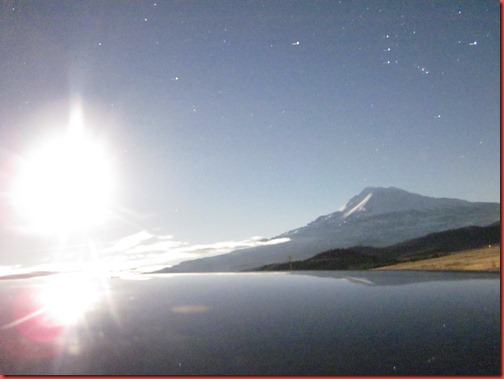
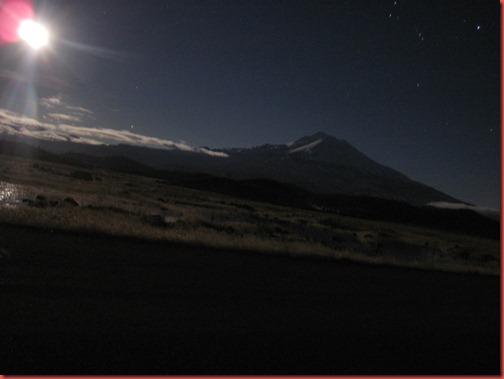
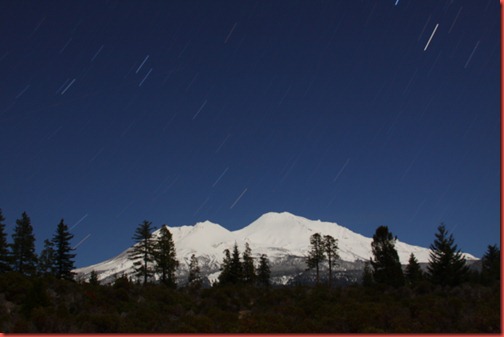
Here’s a shot I took sitting on the top of my husband’s car.  It was an impromptu thing, and it’s with my point and shoot.  That big bright thing is the moon.  That black stuff all across the bottom is a Yaris.  Those streaky things are stars and that is Mt Shasta.
IMG_5641

Things to look for in a tripod – a screw or hook on the bottom that you can use to hook weighted bags too.  This keeps your tripod much much steadier, especially if there is any wind.  A little breeze can seriously ruin a photo.

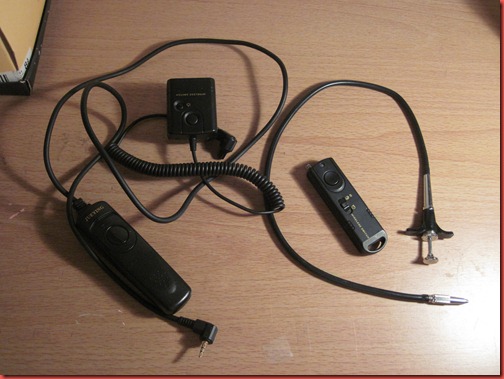
Second, unless you want to stand around for an hour holding your shutter button without moving the camera at all, you’re going to want a cable release.  There are different kinds for different cameras and even some that work via remote control.  I will say, though, the more electronics you shove into a cable release, the more likely the batteries will get too cold and render the thing entirely useless.
IMG_6092

You might also want a flash for certain types of night photography.  Try to get one with a manual trigger.

Finally, you need a camera that lets you adjust the shutter speed and preferably has Bulb.  Most cameras will go up to 30 seconds, but some of these photos can last hours and hours.

First, some notes on night photography in general:

Your auto focus almost always isn’t going to work.  Unless your subject is close.  Sorry ya’ll.

There is a huge amount of experimentation in night photography.  You should bracket your shots.  If you shoot film, you should double bracket your shots.  Then do it again.  And once more.  With digital, zoom in on your LCD to check shots.  Then bracket as well.

Don’t get frustrated.  It takes a lot of really great photographers a lot of effort to get great night shots.  There are so many things that can go wrong.  Just keep at it and you’ll end up with something cool one day.  Promise.

Night photography can be noisy.  Try to shoot at your lowest ISO.  Turn on noise reduction, but turn off your Image Stabilization or VR.

Different cameras handle night photography better than others.  Not that you shouldn’t do it, just be warned and be ready to use Photoshop.

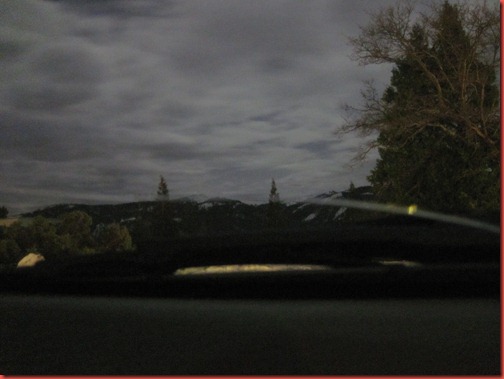
I took these with my Canon Powershot because I wasn’t expecting to take them… they just happened and that’s what I had.  They’re nice and all, just noisy.
IMG_6073

Again, both of these are no tripod.  Above was shot from a car dashboard, below off the top of the Yaris again.
IMG_5646

My Canon 50D does much better in low light.  It does 100x better than my Powershot and 50x better than my old Rebel.  You always wondered why that camera was so much more expensive even though there are Rebels that have similar megapixels and blah blah blah.  It’s because the sensor is better. 

Not that you can’t do this with a Rebel, just expect it to be noisier.  I’ll say it again, STILL TRY THIS!  If you’re handy with Photoshop, you can fix some noise.

Alright, let’s look at some lighting scenarios.  I have a guide cheat sheet from photography class back in the day, so here’s what it says and how it translates to these photos.  All the guides assume you are shooting ISO 100 at f5.6.  If you read my post the other day about stops, you know how to calculate shifts…

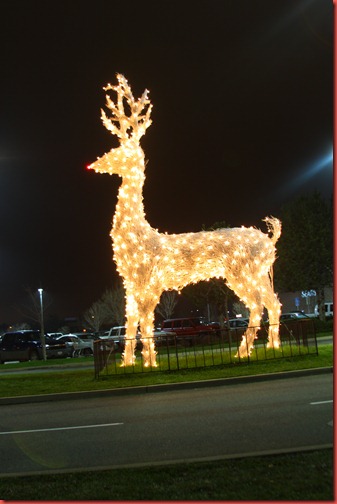
City Lights – Try 1/4 second
IMG_7171

ISO 100, f3.5, 1/2 second.

IMG_7176

ISO 100, f3.5, 1 second

You’ll notice both of these are slower than the recommendation.  That’s why you have to bracket!

ISO 100, f4.5, 30 seconds
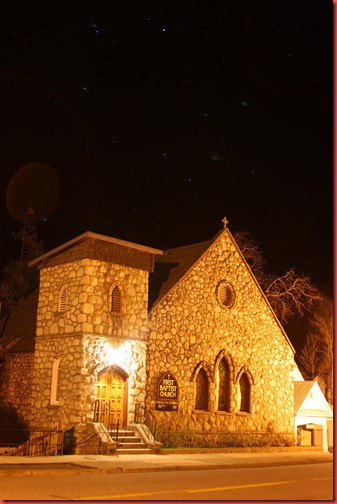
IMG_7198

You can also control the light by over-exposing to get bigger light streaks and even lens flare.
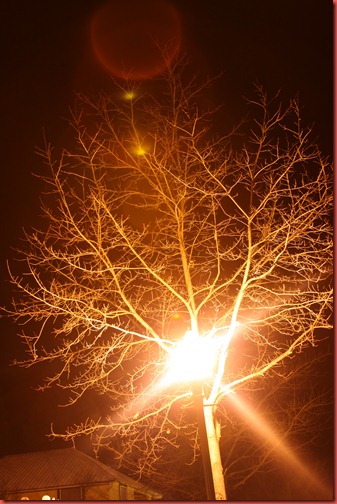
IMG_7194

ISO 100, f4.5, 30 seconds

Freeway Lights – Try 4 seconds

This also depends a lot of how much traffic there is on the freeway.  More cars = more light = less time.
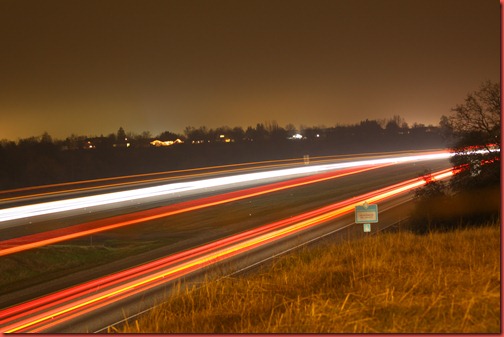
IMG_7182

ISO 100, f4.5, 30 seconds

Subject Lit by Full Moon – 8 minutes
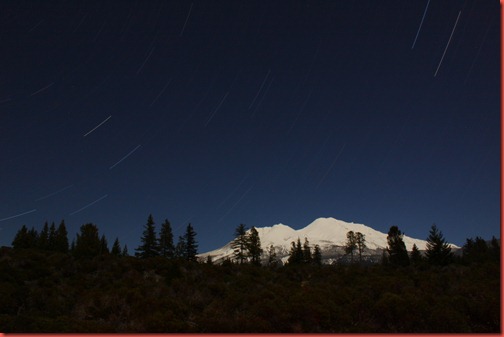
IMG_6269

ISO 200, f16, 30 minutes

I closed my aperture on this full moon lit shot of Mt. Shasta so I could catch longer star trails without overexposing the mountain.

Here’s another version shot at ISO 200, f8 for 10 minutes.  You’ll notice the open aperture made the star trails and sky brighter, but the mountain is still exposed the same amount.
IMG_6204

So, there are some starting points for you to try.  Tomorrow we’ll talk about a couple ways to photograph star trails!  Then later… using your flash to get ghost images.

Shasta Betty

Saturday, January 15, 2011

Your Lomo Settings

Note: This is the third post today, please don’t forget to scroll down and see what else is new.

Sunny and Cloudy.  N and B.  Pictures of little people on your Holga?

Now that we know something about metering, wouldn’t it be nice to tie that in when using a Holga or Diana?

First, Holgas.  Here’s what the pictures on your focusing ring mean.

Now, forget your cloudy or sunny settings.  Seriously, unless you’ve modified the camera or had someone do it, you have ONE F-STOP that is approximately f/13. 

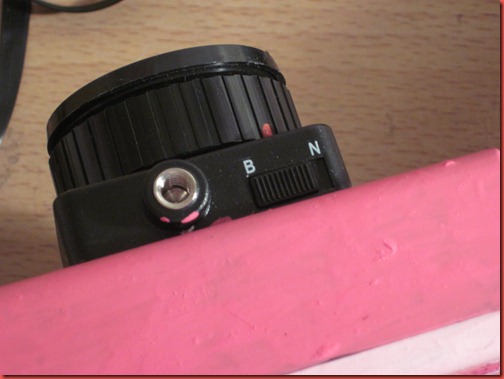
You do, however, usually have 2 shutter speeds.  B and N.  N is around 1/100th of a second.  B stands for Bulb and will stay open as long as you want.

IMG_6099

It’s okay, put in the film with an ISO that will work for you.  Film speed is your friend.

Dianas.

These are a little more precise.  First, your focusing ring has distances listed instead of pictures.

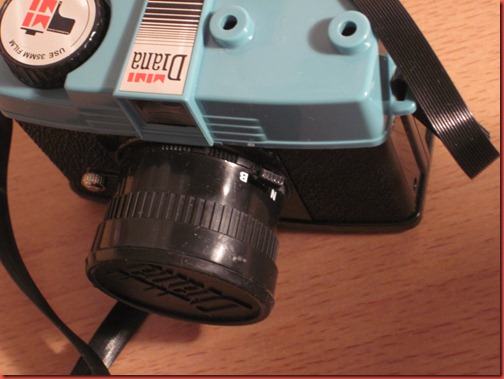
On your aperture ring for the Diana F+, the cloudy aperture is f11, partly cloudy is f16 and sunny is f22. The pinhole is approximately f150.  For the Diana Mini, the cloudy aperture is f8, sunny is f11. 

IMG_6118

Just remember, all the apertures on these are approximate and vary.  If you are really curious, tear the thing open and measure the diameter to calculate your f-stop.  Having opened my Holga twice and accidentally disconnected the wiring that controls the flash twice and having to go back in and rewire twice, I won’t be doing this anytime soon.

IMG_6105

The shutter speed is approximately 1/60th of a second on N, and Bulb on B.

How to Use Bulb

Remember, Bulb will stay open as long as you press the shutter.  So here are some handy lomo tools to go with your bulb settings.

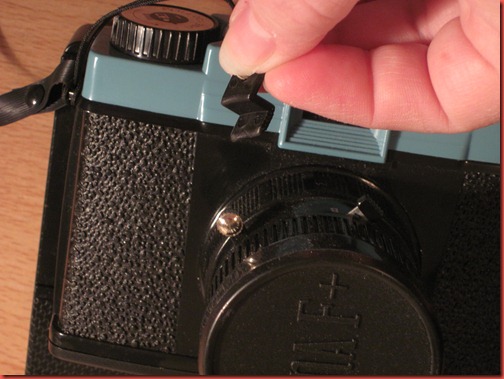
The Diana F+ has a little plastic piece attached to the strap.  Once you’ve pressed the shutter, you put the end of this into the slit where the shutter button is, above the button.  This should lock the button down.  It’s a little clumsy, but they sell a cable release collar that can make it less clumsy.

IMG_6110

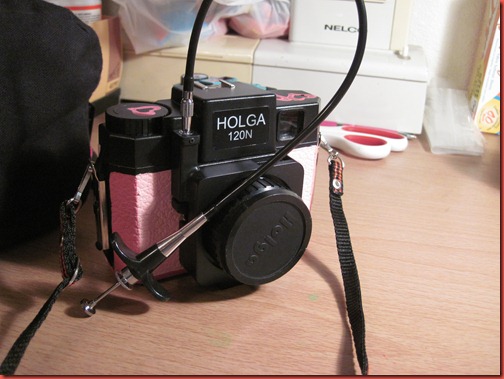
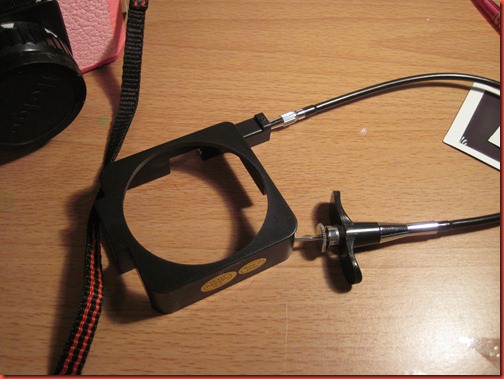
Holga also has a cable release collar.

IMG_6113IMG_6114

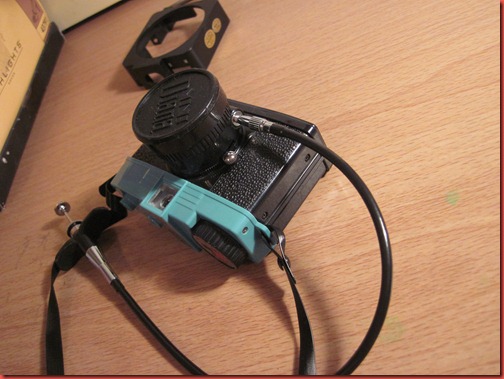
The Diana Mini reigns supreme in my eyes, by having a built in cable release attachment.  Just screw a traditional cable release cord in.

IMG_6117

Alright… that was educational.  I meant to start my night photography series today and got sidetracked… Oops.  I just wanted to make sure you had all the relevant background information.  I fully plan on doing some night photography with my Holga or Dianas!  Hope you will too!

See you tomorrow

Shasta Betty

Sunny 16 rule

As a follow-up to my series on the Basics of Manual settings, here’s a quick and awesome tool for reading light without a meter.  On a sunny day, in direct sunlight, at f16: Your shutter speed will be the reciprocal of your film speed. 

ISO 100 = f16 at 1/100th.  ISO 400 = f16 at /400th.

You can easily extrapolate on the Sunny 16 rule.  If you’re using a pinhole or a Holga with a fixed aperture, just work from Sunny 16 out.  Here’s other apertures that use the film speed/ISO rule of Sunny 16.

f/22
Snow/Sand
f/16
Sunny
f/11
Slight Overcast
f/8
Overcast
f/5.6
Heavy Overcast
f/4
Open Shade/Sunset

Pretty useful for analog photography.  Next… a Lomography post!

Shasta Betty

Film Masks

A mask in film photography is simply the piece of plastic, cardboard, whatever… that defines how much of a piece of film will be exposed during each frame.  In some 120 cameras, you have a 6x6 mask and a 6x4.5 mask.  If you have a Diana mini, you may notice each frame is not the same size as normal 35mm, some are tall and skinny and some are square.

While there are standard sizes used in film photography, you can really use whatever size, or shape you want.  All you have to do is create the frame and put it between your lens and your film.

I decided I wanted to shoot a roll of Holga film using a Heart shaped mask.  It’s cutesy and a little silly, but you might like it.  Here’s what I did:

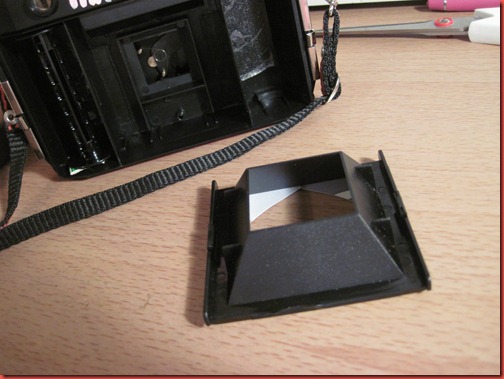
I grabbed the 6x6 mask that came with my Holga.  You don’t need to do this on an existing mask, it just made it easier.

IMG_6120

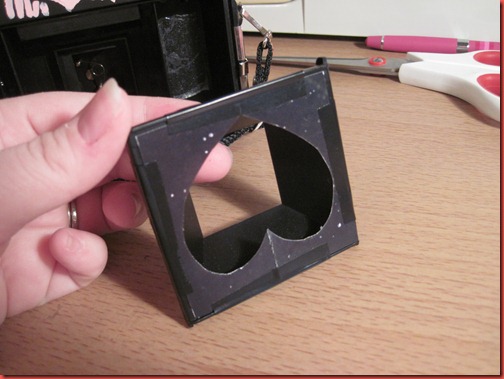
Cut out a shape.  It doesn’t have to be a heart, it could be anything actually.  Cut it out of cardstock or a magazine cover.  Something thick and dark enough that you can’t see light through it.  Use electrical tape and attach it to the mask or the inside of the camera right next to where the film will be.

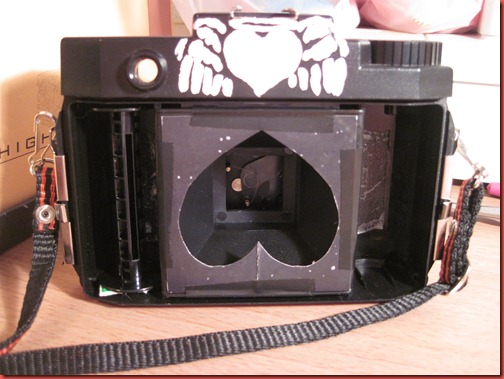
Put your shape upside-down!  The images projected on your film are actually upside-down.  Trust me on this, you’ll see why in a second.

IMG_6121

Put the mask back in and load film, then shoot away.

IMG_6122

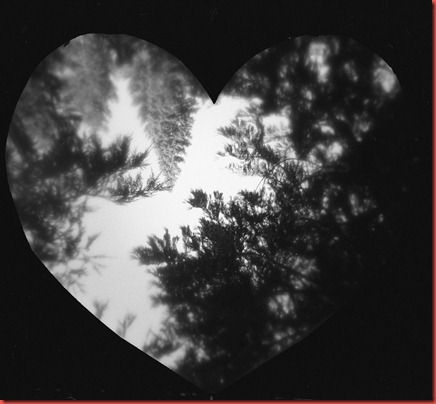
Here’s the result from my first roll.  I forgot to put my mask in upside-down.  So the heart is straight, but the picture is upside down.  Duh.

img041

Or, the picture is straight, but the heart is upside-down.  Double Duh.

img041

There ya go, easy and fun.  You can frame your pictures in just about any shape you can cut out. 

Alternate ideas I’ve heard…. Making 2 masks that are opposite of each other (one blocks out the center, the second blocks out the sides – for example).  Put in one, run the film through.  Switch and run the film through again.  Split frame photos…. strange!  I’m going to try this one soon…

Shasta Betty