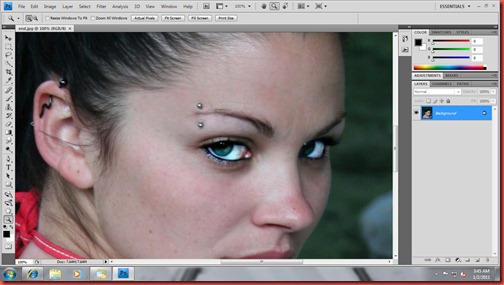
I wanted to share this tip, because this was one aspect of editing that I struggled with. I had read advice elsewhere for removing under eye circles. Spot healing, dodging… nothing really worked well and looked natural.
So, here’s my tip for natural under eye circle removal.
Open your file.
Zoom in.
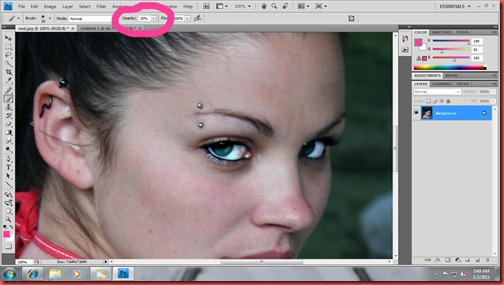
Bust out the clone tool. Select an area just below the dark eye circles (select using Alt-Click).
Turn your brush opacity down to somewhere in the 20’s. You want to work on this a little at a time and in layers. This makes it way easier to do without having to paint perfectly or overdo it.
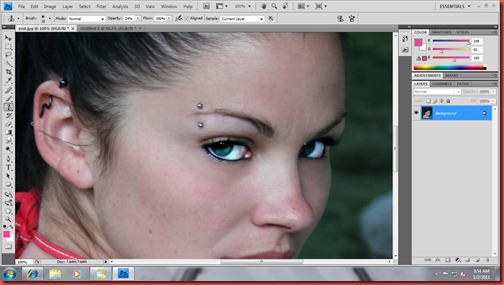
Start painting below the eye in strokes. Here’s a tip, when you’re working with close tool (and brush for that matter), as long as you hold down the mouse button while you are painting, it will only add one layer at a time even if you overlap. That way you can paint without missing a spot or overdoing it with one brush stroke.
Do it just until it looks right. It works great on wrinkles too. Try it, play with it. Another nice thing, since you’re adding in layers, if you realize it looks funky, you can go back a couple steps in history.
The end.
Shasta Betty


This is a great tutorial about Photoshop fixing under the eye circles.This really a great job
ReplyDeleteclipping paths
This looks so great!
ReplyDeleteclipping mask